WIMM Forums/Developer's Guide/Getting Started
TUTORIAL: Connecting to the WIMM One on Windows

Tianwei L.
posted this on Mar 27 09:22
Connecting to a WIMM One device
Congratulations on your new WIMM One developer kit! You are now the cool dude on the block with a wearable Android device! Now let's connect your WIMM One to your PC so you can start hacking out some cool applications.
This guide assumes that you have installed the WIMM SDK and setup your development environment. If you have yet to do that, check out this guide first.
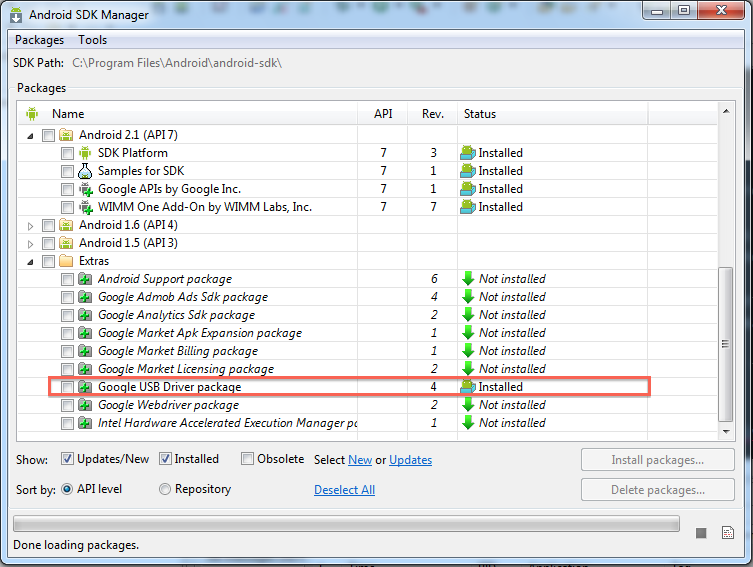
Step 1: Ensure that you have the Google USB Driver package installed.
Open up your Android SDK Manager from Eclipse and ensure that you have "Google USB Driver package" Installed as shown below.
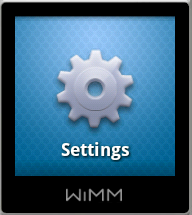
Step 2: Setting up the WIMM Device driver.
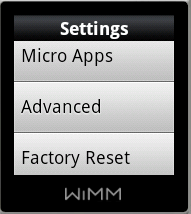
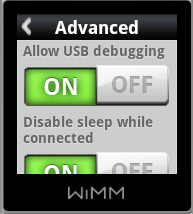
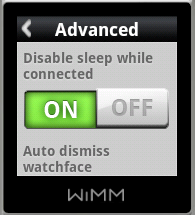
- On the WIMM, navigate to Settings->Advanced and set "Allow USB debugging" and "Disable sleep while connected" to "ON" as shown below. Warning: Your WIMM will take longer to charge in this mode.
- Place the WIMM on the charging paddle and connect it using the USB cable provided to your PC. (The Green Led should light up)
- Windows will try to detect and install the USB device automatically. It should fail after a few minutes.
- Open up Device Manager by:
- Go to the "Start Menu" , Right click on "My computer" and select "Properties".
- Click on the Advanced Tab or "Advanced System settings".
- Click on Device Manager
- You should see "Wimm Android ADB" with a yellow question mark.

- Right Click on it and select "Properties"
- Add WIMM ONE parameters to Google's USB Driver Lists:
- Go to the Details tab, choose "Hardware Ids" and copy the string as shown below.(yours might be slightly different)

- Open the "android_winusb.inf" found in "C:\Program Files\Android\android-sdk\extras\google\usb_driver" with your favorite text-editor
- Add the following lines after the "[Google.NTx86]" and "[Google.NTamd64]" section of the file(the part in red is copied from step 2.5.1) as shown:
- ;
- ;WIMM ONE
- %CompositeAdbInterface% = USB_Install, USB\Vid_23f1&Pid_0001&MI_01

- Go to the Details tab, choose "Hardware Ids" and copy the string as shown below.(yours might be slightly different)
- Select the "Driver" tab and click on "Update Driver".
- Choose to locate and install your driver manually, browse to "C:\Program Files\Android\android-sdk\extras\google\usb_drive"(yours might be different) and start off the installation process.
- After clicking though a few prompt/warning dialogs, you should have the WIMM One properly recognized in your Device Manager as shown below.

You are now ready to create and deploy Apps to your WIMM One!
- Open up a command prompt.
- Enter "android update adb"
- Enter "adb kill-server"
- Enter "adb start-server"
- Enter "adb devices"
- You should see your WIMM ONE recognized over ADB Bridge!

Creating your first app.
Ready to create your own application on the WIMM Platform? This guide will walk you through the classic "Hello world" application in a jiffy.
Help
Feel free to comment below with any questions or contact tianwei@wimm.com if you need additional assistance.